Simple Blueberry Cream Pie: A Delightful Dessert for Every Occasion
Few desserts evoke the comfort of home and the joy of simple pleasures quite like a blueberry cream pie. This quintessential treat, beloved for its luscious creamy filling and vibrant burst of berry flavor, offers a refreshing escape with every spoonful. Whether you're a seasoned baker seeking the satisfaction of a golden, flaky crust or a busy host craving an effortless yet impressive dessert, the beauty of the blueberry cream pie lies in its versatility. We're diving deep into both the classic baked crust rendition and the quick, irresistible no-bake option, ensuring you have the perfect recipe for any mood or season.
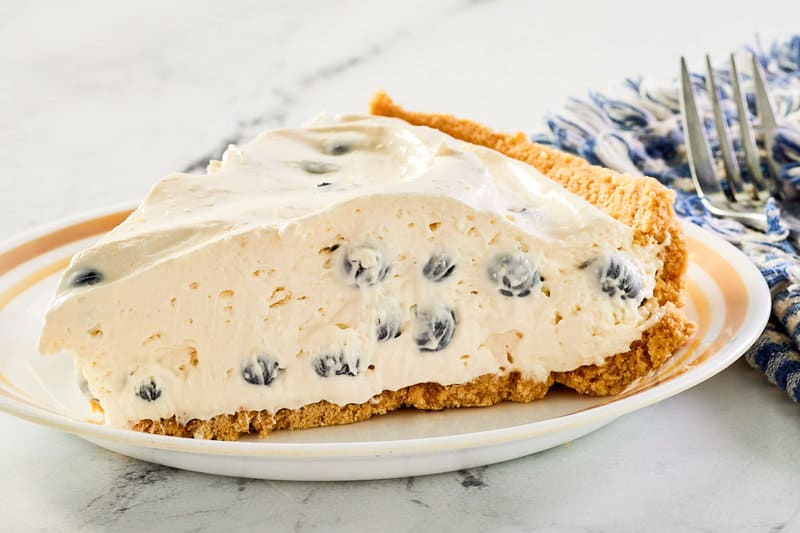
Imagine a smooth, tangy-sweet cream cheese filling, lightened with freshly whipped cream, generously layered over a crisp base, and crowned with a glistening blanket of sweet blueberries. This dream dessert is not only achievable but adaptable. From impromptu summer gatherings to cozy evening indulgences, a homemade blueberry cream pie promises to be a showstopper without the fuss. Let's explore how to bring this delightful creation to your kitchen.
The Classic Baked Blueberry Cream Pie: A Timeless Treat
For those who appreciate the satisfying crunch of a perfectly baked crust complementing a velvety filling, the classic blueberry cream pie with a baked crust is an absolute delight. This method offers a wonderful textural contrast and a rich, buttery foundation that truly elevates the overall experience. Our classic version builds on traditional techniques, ensuring a beautifully balanced pie every time.
Ingredients for Your Classic Baked Blueberry Cream Pie:
- ½ (14.1-ounce) package refrigerated pie crusts, thawed (or your favorite homemade pie crust)
- ¾ cup chopped pecans or walnuts (optional, but highly recommended for added texture and flavor)
- 2 (3-ounce) packages cream cheese, softened to room temperature
- 1 cup Confectioners' sugar
- 1 cup heavy whipping cream, well chilled
- ¼ cup granulated sugar
- 1 (21-ounce) can blueberry pie filling (or homemade blueberry topping)
Directions for the Baked Crust Perfection:
- Prepare the Crust: Preheat your oven to 425˚F (220˚C). On a lightly floured surface, unroll your thawed refrigerated pie crust. Gently roll it into a 12-inch circle to ensure it fits a standard 9-inch pie plate with some overhang. Carefully transfer the crust to the pie plate, pressing it firmly into the bottom and up the sides. Fold any excess edges under and crimp them decoratively as desired.
- Add a Nutty Base (Optional but Recommended): For an extra layer of flavor and to help prevent a soggy bottom, lightly press the chopped pecans or walnuts evenly into the bottom of the unbaked crust. This creates a delightful, unexpected crunch with every bite.
- Bake the Crust: Bake the prepared crust for 8 to 9 minutes, or until it turns a beautiful golden brown. Keep a close eye on it to prevent over-browning. Once baked, remove from the oven and allow it to cool completely on a wire rack. This step is crucial; a warm crust will melt your creamy filling.
- Craft the Cream Cheese Layer: While the crust cools, prepare your filling. In a large bowl, using an electric mixer on medium speed, beat the softened cream cheese and confectioners' sugar until the mixture is smooth, light, and well combined. Ensure there are no lumps.
- Whip the Cream: In a separate medium bowl, beat the well-chilled heavy whipping cream and granulated sugar with an electric mixer on medium-high speed until soft, billowy peaks form. Be careful not to over-whip, as it can turn grainy.
- Combine and Fill: Gently fold the whipped cream mixture into the cream cheese mixture. Use a spatula and light hand to maintain the airy texture of the whipped cream. Spoon this creamy filling into your completely cooled pie crust, spreading it evenly.
- Chill and Top: Refrigerate the pie for at least 1 hour to allow the filling to set. Just before serving, generously top the pie with the canned blueberry pie filling, spreading it from edge to edge.
- Final Chill: For the best texture and flavor, refrigerate the pie until it's thoroughly chilled, typically another 2-3 hours, before slicing and serving. This allows all the flavors to meld beautifully.
Quick & Easy: The Irresistible No-Bake Blueberry Cream Pie
When the sun is shining, or your schedule is packed, the thought of turning on the oven might be less than appealing. Enter the no-bake blueberry cream pie – an effortlessly impressive dessert that truly "steals the show" without heating up your kitchen. This version is celebrated for its ease, minimal prep, and the same maximal flavor, making it a perfect choice for summer gatherings, potlucks, or simply when you're craving something fresh, fruity, and creamy on a whim.
The beauty of the no-bake method is its simplicity, relying on a harmony of easily accessible ingredients that blend sweetness, creaminess, and a delightful crunch, often from a buttery graham cracker crust. It's truly a forgiving recipe that adapts well to your preferences and pantry staples.
Ingredients for Your Quick No-Bake Blueberry Cream Pie:
- 1 (9-inch) pre-made graham cracker crust (or your choice of no-bake crust)
- 2 (3-ounce) packages cream cheese, softened to room temperature
- 1 cup Confectioners' sugar
- 1 cup heavy whipping cream, well chilled
- ¼ cup granulated sugar
- 1 (21-ounce) can blueberry pie filling (or a quick homemade blueberry compote)
Directions for the No-Bake Wonder:
- Prepare Your Crust: Begin with your pre-made graham cracker crust. For extra stability, especially in warmer weather, you can briefly freeze the crust for 15-20 minutes before filling, or even bake it at 350°F (175°C) for 10-12 minutes for a sturdier, crispier base, ensuring it cools completely afterward.
- Cream Cheese Base: In a large bowl, using an electric mixer on medium speed, beat the softened cream cheese and confectioners' sugar together until the mixture is smooth, airy, and completely free of lumps. This creates the rich, tangy foundation of your filling.
- Whip the Cream: In a separate medium bowl, pour in the well-chilled heavy whipping cream and granulated sugar. Using an electric mixer on medium-high speed, beat until soft, luscious peaks form. The key here is to watch it closely and stop as soon as the peaks hold their shape to avoid over-whipping.
- Fold to Combine: Gently fold the whipped cream into the cream cheese mixture using a rubber spatula. The goal is to incorporate the two without deflating the air from the whipped cream, ensuring a light and fluffy filling.
- Fill the Crust: Spoon the entire creamy filling into your prepared graham cracker crust, spreading it evenly with the back of a spoon or spatula to create a smooth surface.
- Chill for Stability: Place the pie in the refrigerator and chill for at least 2-3 hours. This crucial step allows the filling to firm up and set beautifully, ensuring clean slices.
- Top and Serve: Just before serving, retrieve your chilled pie and spoon the blueberry pie filling generously over the cream layer. Spread it gently to cover the top.
- Enjoy! Your irresistible no-bake blueberry cream pie is ready to be sliced and devoured. It's best served well chilled.
Mastering Your Blueberry Cream Pie: Tips for Perfection
Regardless of whether you choose the baked or no-bake route, a few key tips can elevate your blueberry cream pie from great to absolutely unforgettable:
- Room Temperature Cream Cheese is Non-Negotiable: Always ensure your cream cheese is completely softened to room temperature. This prevents lumps and guarantees a silky-smooth, uniform filling.
- Chilled Whipping Cream & Bowl: For the best results when whipping cream, make sure both the heavy cream and your mixing bowl (and even beaters) are very cold. You can place the bowl and beaters in the freezer for 10-15 minutes before whipping. This helps the cream whip up faster and hold its peaks better.
- Don't Over-Whip: Be mindful not to over-whip the heavy cream. Once soft peaks form, stop. Over-whipped cream can become grainy or even turn into butter.
- The Power of Chilling: Patience is a virtue, especially with blueberry cream pie. Adequate chilling time (at least 2-3 hours, ideally longer) allows the filling to set properly, making for cleaner slices and a more enjoyable, stable texture.
- Customize Your Topping: While canned blueberry pie filling is incredibly convenient, don't hesitate to experiment. For a fresher taste, you can simmer fresh or frozen blueberries with a little sugar, lemon juice, and cornstarch for a homemade compote. A dash of lemon zest in the cream cheese filling also beautifully complements the blueberries.
- Garnish for Impact: A simple garnish can make your pie look even more appealing. A few fresh blueberries, a sprig of mint, or a light dusting of confectioners' sugar can add that professional touch.
- Storage: Both baked and no-bake blueberry cream pies store beautifully in the refrigerator for up to 3-4 days, covered loosely with plastic wrap. This makes them excellent make-ahead desserts.
Conclusion
Whether you opt for the classic, comforting appeal of a baked crust or the refreshing ease of a no-bake wonder, the blueberry cream pie remains a timeless dessert that delivers on flavor and satisfaction. It's a testament to how simple ingredients, thoughtfully combined, can create something truly spectacular. With its creamy, dreamy filling and vibrant blueberry topping, this pie is destined to become a staple in your dessert repertoire, ready to impress family and friends on any occasion. So go ahead, choose your adventure, and bake (or no-bake!) a little slice of heaven today!
